
The Kenmore Mini Ultra Sewing Machine is a compact, versatile, and user-friendly sewing machine designed for both beginners and experienced sewers․ Its lightweight and portable design makes it ideal for various sewing tasks, from simple repairs to intricate quilting projects․ With a built-in free arm, multiple stitch options, and an easy-to-use interface, this machine offers endless creativity and ease of use․
1․1 Overview of the Kenmore Mini Ultra Sewing Machine
The Kenmore Mini Ultra Sewing Machine is a compact, portable sewing machine designed for versatility and ease of use․ It features a built-in free arm, ideal for sewing sleeves and pant legs, and offers multiple stitch options, including straight, zigzag, and decorative stitches․ The machine’s adjustable stitch length and width allow for customization, while its drop-in bobbin system simplifies setup․ Lightweight and user-friendly, it is perfect for both beginners and experienced sewers, making it a great companion for crafting, repairs, and quilting projects․ A comprehensive manual is provided for optimal use․
1․2 Importance of the Manual for Optimal Performance
The manual is essential for maximizing the potential of the Kenmore Mini Ultra Sewing Machine․ It provides detailed instructions for threading, bobbin winding, and troubleshooting, ensuring users can address common issues quickly․ The manual also offers maintenance tips to prolong the machine’s lifespan and warranty information for added peace of mind․ By following the guidelines, users can optimize stitch quality, prevent errors, and enjoy a seamless sewing experience․ Whether you’re a novice or an experienced sewer, the manual is a vital resource for achieving professional results and maintaining machine performance․
Key Features and Specifications
The Kenmore Mini Ultra Sewing Machine features a built-in free arm, multiple stitch options, adjustable stitch length and width, and a convenient drop-in bobbin system․
2․1 Built-In Free Arm for Versatile Sewing
The Kenmore Mini Ultra Sewing Machine includes a built-in free arm, offering flexibility and ease when sewing hard-to-reach areas like sleeves and pant legs․ This feature allows for smooth maneuvering of fabric, ensuring precise stitching and professional results․ The free arm is ideal for both small and large projects, making it a versatile tool for sewers of all skill levels․ Its compact design ensures portability, while the free arm enhances functionality for a variety of sewing tasks․
2․2 Multiple Stitch Options for Diverse Projects
The Kenmore Mini Ultra Sewing Machine offers a variety of stitch options, including straight stitch, zigzag stitch, and decorative stitches, to cater to different sewing needs․ These stitches allow users to create versatile projects, from basic repairs to intricate designs․ The straight stitch is ideal for straight-line sewing, while the zigzag stitch is perfect for preventing fraying on raw edges․ Decorative stitches add a creative touch to garments and home decor․ This versatility makes the machine suitable for both beginners and experienced sewers, ensuring a wide range of creative possibilities․
2․3 Adjustable Stitch Length and Width
The Kenmore Mini Ultra Sewing Machine features adjustable stitch length and width, allowing for precise control over your sewing projects․ This functionality enables you to customize stitches to suit different fabrics and tasks, ensuring professional-looking results․ The stitch length can be adjusted to accommodate various materials, from delicate fabrics to heavier textiles, while the width adjustment is particularly useful for decorative stitching and zigzag patterns․ This versatility makes the machine adaptable to a wide range of sewing needs, providing users with the flexibility to achieve their creative vision effortlessly․
2․4 Drop-In Bobbin System for Easy Use
The Kenmore Mini Ultra Sewing Machine features a convenient drop-in bobbin system, designed to simplify the sewing process․ This system allows for quick and easy bobbin installation, eliminating the need for complicated adjustments․ Simply place the bobbin into the bobbin case, guide the thread through the designated guides, and you’re ready to sew․ The drop-in system reduces preparation time and minimizes the risk of thread tangling or improper alignment, making it a user-friendly feature that enhances sewing efficiency and ensures smooth operation for both beginners and experienced sewers alike․
Setup and Preparation
Setting up your Kenmore Mini Ultra Sewing Machine involves unboxing, initial assembly, and routine maintenance․ Proper preparation ensures smooth operation and longevity․ Follow manual guidelines carefully․
3․1 Unboxing and Initial Setup
Unboxing the Kenmore Mini Ultra Sewing Machine is an exciting first step․ Carefully remove the machine from its packaging and inspect for any damage․ Inside, you’ll find the sewing machine, foot pedal, power cord, and assorted accessories like bobbins, needles, and a screwdriver․ Place the machine on a stable, flat surface․ Before use, ensure all components are included and properly attached․ Familiarize yourself with the machine’s parts, such as the spool pins, tension discs, and stitch selector․ Plug in the machine and test it with a scrap piece of fabric to ensure it’s working smoothly․
3․2 Routine Maintenance and Care Tips
Regular maintenance ensures the Kenmore Mini Ultra Sewing Machine performs optimally․ Clean the machine frequently by removing lint and debris from the bobbin area and tension discs using a soft brush․ Oil the machine as recommended in the manual, typically at the points indicated․ Avoid over-oiling, as it can attract dust․ Store the machine in a dry, cool place, and use a dust cover when not in use․ Properly care for bobbins by keeping them clean and ensuring they are wound correctly․ Refer to the manual for specific maintenance schedules and tips to extend the machine’s lifespan․

Threading the Kenmore Mini Ultra Sewing Machine
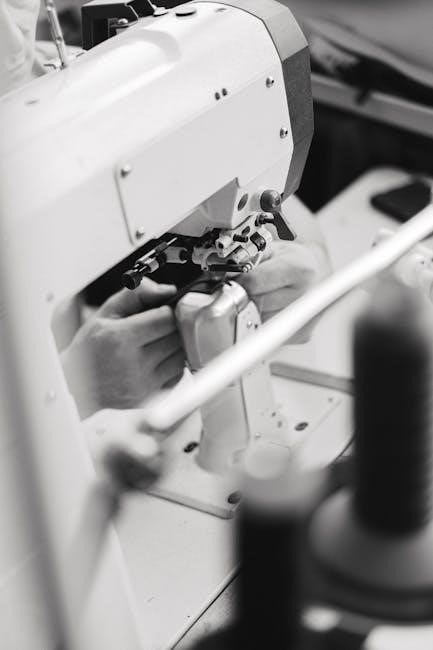
Threading the Kenmore Mini Ultra is straightforward․ Raise the presser foot, wind thread around the spool pin, guide it through the tension discs, and thread the needle․ The clear thread path ensures easy setup for sewing․
4․1 Step-by-Step Threading Process
Threading the Kenmore Mini Ultra sewing machine is a simple process․ Start by raising the presser foot and winding the upper thread around the spool pin․ Guide the thread through the thread guide on the machine’s top, then through the tension discs located above the needle․ Next, pass the thread through the thread guide on the needle bar and carefully thread the needle․ Ensure the thread is properly seated in each guide to maintain proper tension․ The machine’s clear thread path makes this process easy to follow, ensuring smooth stitching and optimal performance․
4;2 Adjusting Thread Tension for Perfect Stitches
Proper thread tension is essential for achieving perfect stitches․ Locate the tension dial on the top of the Kenmore Mini Ultra sewing machine, typically numbered 0-9․ Start with the recommended setting (usually 4-5) and test on scrap fabric․ If stitches are too loose, increase tension by turning the dial to a higher number․ If too tight, reduce tension by turning to a lower number․ Adjust based on fabric type, thread weight, and needle size․ Proper tension ensures balanced stitches, preventing puckering or thread breakage․ Always test adjustments on scrap fabric before sewing your project․

Bobbin Winding and Replacement
The Kenmore Mini Ultra sewing machine features a convenient bobbin winder for easy thread winding․ Ensure the bobbin is securely seated and thread is properly guided for smooth sewing․
5․1 How to Wind the Bobbin Correctly
To wind the bobbin on your Kenmore Mini Ultra sewing machine, start by placing the bobbin on the bobbin winder spindle․ Thread the end of the thread through the bobbin winder guide and pull it through the small hole in the bobbin․ Hold the thread end and press the foot pedal to begin winding․ The machine will automatically stop when the bobbin is full․ Ensure the thread is evenly wound and not loose․ Properly wound bobbins are essential for smooth stitching and to prevent thread breaks during sewing․
5․2 Tips for Proper Bobbin Replacement
To replace the bobbin, turn off the machine and remove any remaining thread․ Gently pull out the bobbin case and insert the wound bobbin, ensuring it seats properly․ Pull the thread through the bobbin tension slot and leave a small loop․ Replace the bobbin case, making sure it clicks into place․ Keep the thread straight and avoid twisting it․ Use the correct bobbin size and type for your machine․ After replacement, test the machine by sewing a few stitches to ensure proper thread flow and tension․ This ensures consistent stitch quality and prevents issues during sewing․
Troubleshooting Common Issues
Common issues include thread breakage, tension imbalance, and error codes․ Check thread alignment, adjust tension settings, and consult the manual for specific error code solutions․
6;1 Identifying and Solving Thread Breakage
Thread breakage is a common issue that can occur due to improper threading, incorrect tension, or using the wrong thread type․ To solve this, first, rethread the machine following the manual’s guide, ensuring the thread is properly seated in all guides․ Adjust the tension dial to the recommended setting (usually 4-5) and test on scrap fabric․ If the issue persists, check for knots or tangles in the thread and ensure the needle is correctly installed․ Using high-quality thread suitable for your fabric type can also prevent breakage․
6․2 Fixing Tension Imbalance and Puckering
Tension imbalance and puckering can occur due to incorrect thread tension or improper fabric handling․ To fix this, adjust the tension dial to the recommended setting (usually 4-5) and test on scrap fabric․ Ensure the fabric is guided smoothly and evenly under the presser foot․ If puckering persists, check for loose thread ends or improper threading․ Using the correct needle size and thread type for your fabric can also resolve tension issues․ Properly winding the bobbin and ensuring it is seated correctly in the machine can help achieve balanced stitches․
6․3 Understanding Error Codes and Solutions
The Kenmore Mini Ultra Sewing Machine may display error codes like E1, E2, or E3, indicating issues such as thread breakage or bobbin problems․ E1 often signals improper threading, while E2 may point to a misaligned needle or incorrect bobbin placement․ E3 could indicate a tension imbalance․ To resolve these, refer to the manual for guidance․ Check the thread path, ensure the bobbin is properly seated, and adjust tension settings as needed․ Regular maintenance, such as cleaning and oiling, can also prevent errors and ensure smooth operation․
Advanced Sewing Techniques
Mastering decorative stitches and zigzag patterns enhances creativity․ Adjustable stitch settings allow customization for intricate designs, enabling users to explore advanced techniques and achieve professional-quality results effortlessly․
7․1 Mastering Decorative Stitches and Zigzag Patterns
The Kenmore Mini Ultra Sewing Machine offers a variety of decorative stitches and zigzag patterns, perfect for embellishing fabrics and creating unique designs․ To master these stitches, start by experimenting with scrap fabric to observe how each stitch performs․ Adjust the stitch length and width settings to customize the appearance of your work․ For zigzag patterns, maintain consistent fabric movement to ensure even stitching․ Use the machine’s built-in tension adjustment to prevent thread breakage or puckering․ Practice these techniques to enhance your sewing projects with professional-looking results․
- Use scrap fabric to test stitch settings․
- Adjust stitch length and width for desired effects․
- Ensure steady fabric movement for consistent zigzag patterns․
- Customize thread tension for optimal results․
7․2 Customizing Projects with Adjustable Stitch Settings
The Kenmore Mini Ultra Sewing Machine allows for precise customization of your sewing projects with its adjustable stitch length and width settings․ By modifying these settings, you can tailor stitches to suit various fabrics and designs, ensuring professional-looking results․ Experiment with different combinations to achieve the desired texture and appearance for your creations․ Use the stitch selector dial to choose from a range of options, and fine-tune the settings based on the specific needs of your project․ This feature enables you to add a personal touch to every seam, making your work truly unique․
- Adjust stitch length for denser or looser stitching․
- Modify stitch width to accommodate different fabrics․
- Test settings on scrap fabric before sewing․
- Refer to the manual for specific adjustment guidelines․
The Kenmore Mini Ultra Sewing Machine is a versatile and user-friendly tool for sewers of all skill levels․ Its adjustable settings and comprehensive manual ensure optimal performance and creativity․ Regular maintenance and proper thread tension adjustments will extend its lifespan․ Explore its features, experiment with stitches, and enjoy crafting unique projects with confidence․ Happy sewing!
8․1 Best Practices for Longevity and Performance
Regular maintenance is key to extending the life of your Kenmore Mini Ultra Sewing Machine․ Always keep it clean, oiling moving parts as recommended․ Proper threading and tension adjustment ensure smooth operation․ Use high-quality threads and needles suitable for your fabric type․ Avoid extreme temperatures and store the machine in a dry, dust-free environment․ Regularly inspect and replace worn parts to maintain performance․ By following these practices, you’ll enjoy consistent stitching and prolong the machine’s longevity, ensuring years of reliable service for all your sewing projects․
8․2 Warranty Information and Customer Support
Your Kenmore Mini Ultra Sewing Machine is backed by a comprehensive warranty that covers parts and labor for a specified period․ For detailed warranty terms, refer to the manual or visit the Kenmore website․ Customer support is readily available through phone, email, or live chat to address any questions or concerns․ Additionally, Sears Parts Direct offers genuine replacement parts and repair resources․ Register your machine to activate warranty benefits and ensure seamless support for years of reliable performance․