
This guide provides essential troubleshooting tips, error code explanations, and maintenance advice for optimal GE washer performance and longevity․
Overview of GE Washing Machines and Their Features
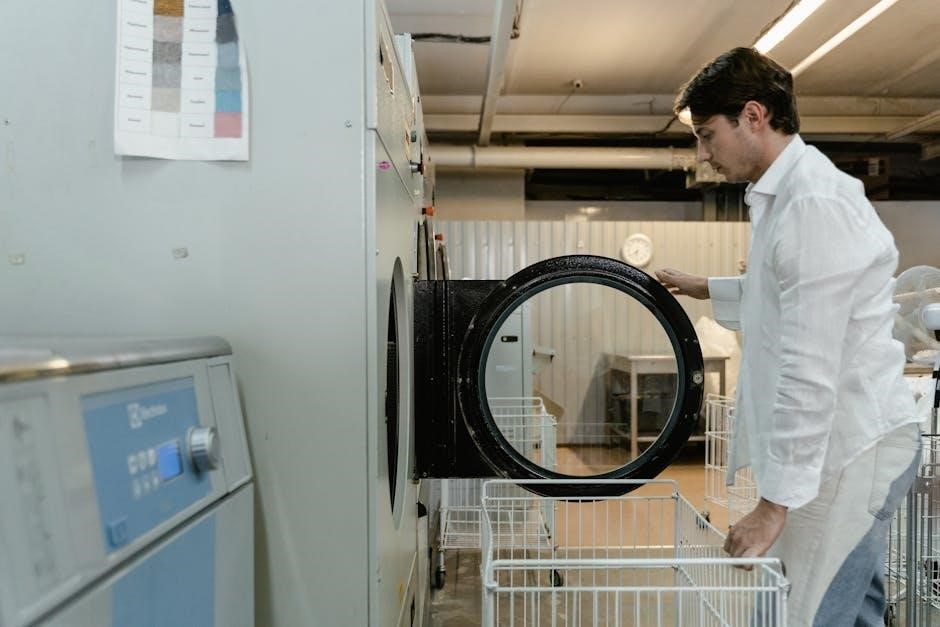
GE washing machines are known for their innovative designs, smart connectivity, and energy-efficient operation․ They offer a range of models, from top-load to front-load, with advanced features like steam cleaning, multiple wash cycles, and quiet operation․ GE washers are designed for reliability and performance, incorporating modern technology to enhance user experience․ Their troubleshooting manuals provide detailed guidance for diagnosing and resolving common issues, ensuring optimal functionality and longevity of the appliance․
Importance of Troubleshooting Manuals for Maintenance and Repair
Troubleshooting manuals are essential for maintaining and repairing GE washing machines․ They provide clear guidance on diagnosing issues, from error codes to mechanical problems, enabling users to address malfunctions effectively․ Regular maintenance tips and repair instructions help prevent breakdowns and extend the appliance’s lifespan․ By empowering users with knowledge, these manuals reduce the need for costly professional interventions, ensuring efficient and prolonged machine performance;

Common Issues and Solutions
Common Issues and Solutions․ This section addresses frequent problems such as the washer not filling with water, low water flow, or failing to spin/drain properly․ Solutions include checking hoses, ensuring proper installation, and utilizing diagnostic modes for effective troubleshooting․
Washing Machine Not Filling with Water
If your GE washing machine isn’t filling with water, check for kinked or blocked hoses and ensure water valves are fully open․ Inspect fill hoses for damage and clean water inlet filters to remove debris․ Low house water pressure or faulty control boards could also cause this issue․ Consider resetting the machine or checking for error codes like the 2-flash error․ Contact GE support if problems persist․
Low Water Flow and Possible Causes
Low water flow in your GE washing machine can result from kinked or clogged hoses, faulty water inlet valves, or debris in the screens․ Check and clean the water inlet screens regularly to ensure proper flow․ Inspect hoses for bends or blockages and replace if damaged․ Additionally, ensure water supply valves are fully open․ If issues persist, consider replacing the inlet valve or checking for system restrictions․ Refer to the manual for detailed guidance on resolving low water flow problems effectively․
Washing Machine Not Spinning or Draining
If your GE washing machine isn’t spinning or draining, check for blockages in the drain pump filter or hose․ Ensure the drain hose is properly installed and not kinked․ Faulty sensors or an imbalanced load can also cause spinning issues․ Verify the machine is leveled correctly and run a diagnostic cycle․ If problems persist, consult the manual for resetting or contact GE support for assistance․ Regular maintenance, like cleaning the filter, can prevent such issues․

Troubleshooting Steps
Check power supply, ensure proper installation, and reset the machine․ These steps can resolve common issues․ Use diagnostic mode for deeper problems and consult the manual for guidance․
Checking the Power Supply and Electrical Connections
Ensure the washing machine is properly plugged into a functioning electrical outlet․ Verify that the power cord is securely connected to both the washer and the wall․ Check the circuit breaker or fuse box to confirm the circuit hasn’t tripped or blown․ If using an extension cord, ensure it’s rated for the washer’s power requirements․ Consult the manual for specific electrical specifications․ Common issues include loose connections or tripped breakers, which can easily be resolved by resetting or tightening the connections․
Ensuring Proper Installation and Leveling of the Machine
Proper installation and leveling are crucial for optimal performance․ Ensure the washing machine is placed on a stable, even surface to prevent vibrations․ Use a spirit level to verify balance and adjust the legs as needed․ Check that the drain hose is securely connected and properly positioned․ Ensure the machine is installed away from direct sunlight and moisture for longevity․ Follow the manual’s installation guidelines to avoid operational issues and ensure safety during use․ Proper leveling prevents noise and uneven washing performance, enhancing overall efficiency․
Resetting the Washing Machine to Factory Settings
Resetting your GE washing machine to factory settings can resolve various issues․ Unplug the machine, press and hold the “Start/Stop” button for 5 seconds, then plug it back in․ This resets settings to default․ For models with diagnostic mode, enter it by pressing specific buttons, then exit to restore factory settings․ Resetting helps clear error codes and restores proper functionality․ If issues persist, consult the manual or contact GE support for further assistance․

Maintenance Tips
- Clean the gasket and drain pump filter regularly to prevent mold and odors․
- Check and replace hoses every 5 years to ensure proper water flow․
- Ensure proper ventilation to avoid moisture buildup and extend machine lifespan․
Cleaning the Gasket and Drain Pump Filter
Cleaning the gasket and drain pump filter is crucial for maintaining your GE washing machine’s performance․ Regularly inspect and remove debris from the gasket to prevent mold growth and odors․ For the drain pump filter, locate it at the bottom front of the machine, remove it, and rinse it thoroughly․ Use a mixture of vinegar and water or bleach to sanitize the gasket․ Ensure all parts are dry before reassembling․ This practice prevents clogs and ensures smooth operation․ Schedule this maintenance every 1-2 months for optimal results․
Checking and Replacing Washers and Hoses
Regularly inspect the washers and hoses for signs of wear, cracks, or mineral buildup․ Replace washers if they appear worn or corroded to prevent leaks․ For hoses, check for cracks or damage and replace them every 5 years, as recommended by GE Appliances․ Use a wrench to tighten loose connections and ensure all hoses are securely attached․ Cleaning or replacing these components helps maintain water flow and prevents potential breakdowns, ensuring your washing machine operates efficiently and reliably over time․
Ensuring Proper Ventilation and Preventing Mold
Proper ventilation is crucial to prevent mold growth in your GE washing machine․ After each use, leave the lid open to allow moisture to evaporate․ Regularly clean the gasket and drain pump filter to remove debris․ Check and ensure drain hoses are not kinked or blocked, promoting smooth water flow․ Neglecting these steps can lead to mold buildup, causing unpleasant odors and potential damage․ Regular maintenance ensures a fresh, efficient washing machine and prevents long-term issues․
Error Codes and Their Meanings
GE washing machine error codes, like the 2-flash error, indicate specific issues․ These codes help diagnose problems, from belt slippage to sensor malfunctions, guiding effective repairs․
Understanding Common Error Codes Like the 2-Flash Error
GE washing machines display error codes to indicate specific issues․ The 2-flash error, for instance, signals a potential problem with the belt or drum․ These codes guide users and technicians to identify and address malfunctions efficiently․ By referencing the manual, you can decode each flash pattern, understanding whether it relates to mechanical components or sensor failures․ This feature enhances troubleshooting, ensuring swift resolution and minimizing downtime for repairs․
How to Identify and Fix Error Codes Using the Manual
GE manuals provide detailed explanations of error codes, guiding users through diagnosis and repair․ By locating the error code section, you can match flash patterns to specific issues․ Each code directs you to potential causes, such as faulty sensors or blocked drains․ Step-by-step solutions and recommended checks help you resolve problems independently․ This resource empowers users to address issues confidently, reducing the need for professional assistance and ensuring efficient appliance operation․

Diagnostic Mode and Advanced Troubleshooting
Activate diagnostic mode to identify issues like faulty sensors or worn belts․ The manual provides step-by-step solutions, empowering users to resolve complex problems efficiently and independently․
How to Activate Diagnostic Mode on GE Washers
Activate diagnostic mode on your GE washer by pressing and holding the “Start/Stop” and “Power” buttons simultaneously for 5 seconds․ This feature helps identify issues like faulty sensors or worn belts․ Follow the manual’s instructions to navigate through error codes, such as the 2-flash error, which often indicates a slipping belt․ Use this mode to pinpoint problems and perform repairs effectively, ensuring optimal performance and extending the machine’s lifespan․
Interpreting Diagnostic Results for Effective Repair
Once diagnostic mode is activated, the washer displays error codes like the 2-flash error, indicating issues such as a slipping belt or faulty sensor․ Refer to the troubleshooting manual to match codes with specific problems․ Use the manual’s guidance to implement repairs, like adjusting belts or replacing worn parts․ This step-by-step process ensures accurate diagnosis and effective solutions, helping you restore your GE washer to optimal functionality and prevent future breakdowns․

Accessing and Using the Troubleshooting Manual
Access the GE washing machine manual online or via the official website․ Download the PDF guide for detailed troubleshooting steps, error code explanations, and repair instructions․
Where to Find the Manual and How to Download It
GE washing machine troubleshooting manuals are available on the official GE Appliances website․ Visit the support section, enter your model number, and download the PDF guide․ Manuals can also be found in the product packaging or by contacting GE customer support․ Additionally, the manual may be located inside the machine’s control console or main housing․ For convenience, download the manual directly from the GE Appliances website using the provided link: GE Appliances Support․
Step-by-Step Guide to Using the Manual for Repairs
Locate the troubleshooting section in the manual to identify your issue․ Use error codes or symptom descriptions to pinpoint the problem․ Follow the step-by-step repair instructions provided․ Ensure you have the necessary tools and replacement parts before starting; For advanced issues, activate diagnostic mode to gather detailed information․ If repairs are complex, contact GE Appliances support for professional assistance․ Always refer to the manual for safety precautions and warranty information to avoid further damage or voiding your warranty․

Preventative Maintenance
Regularly clean filters, check hoses, and ensure proper leveling to prevent breakdowns․ Schedule maintenance to extend lifespan and maintain optimal performance of your GE washing machine․
Scheduling Regular Maintenance to Avoid Breakdowns
Regular maintenance is crucial for preventing unexpected issues with your GE washing machine․ Inspect hoses for wear, clean filters, and ensure proper leveling․ Schedule professional check-ups annually to identify potential problems early․ Additionally, run cleaning cycles and check for blockages in drainage systems․ Proper ventilation and consistent care routines will help maintain efficiency and extend the lifespan of your appliance․ By being proactive, you can avoid costly repairs and ensure reliable performance․
Tips for Extending the Lifespan of Your Washing Machine
Tips for Extending the Lifespan of Your Washing Machine
Extend your GE washing machine’s lifespan by incorporating regular maintenance․ After each use, leave the lid open to prevent mold and mildew․ Clean the gasket with a vinegar solution to remove debris․ Check and clean the drain pump filter regularly to avoid clogs․ Run a cleaning cycle monthly to remove detergent residue․ Ensure the machine is balanced using a spirit level to prevent vibrations․ Replace hoses every few years, preferably with stainless steel ones․ Inspect the drain hose for kinks or blockages․ Use the recommended detergent amount to avoid residue buildup․ Consider using a washing machine cleaner every 1-2 months․ Address unusual noises or performance issues promptly with professional maintenance․ Create a maintenance schedule to track these tasks and ensure longevity․
GE Customer Support and Resources
GE Appliances provides extensive customer support through their website, offering manuals, troubleshooting guides, and expert assistance․ Users can schedule service online and access additional resources easily․
How to Contact GE Appliances for Assistance
For support, visit the GE Appliances website and navigate to the support section․ Enter your appliance’s model number to find specific troubleshooting guides․ You can schedule service online or contact customer care directly․ Additionally, error codes like the 2-flash error are addressed in manuals, helping users identify and resolve issues quickly without needing a technician․
Additional Online Resources for Troubleshooting
Beyond manuals, GE Appliances offers extensive online support․ Visit their official website for FAQs, video tutorials, and error code explanations․ Online forums like Repair Clinic and ApplianceBlog provide user-generated solutions․ YouTube channels specialize in appliance repairs, offering step-by-step guides․ Additionally, downloadable PDF manuals and diagnostic tools are available, ensuring comprehensive troubleshooting assistance for GE washing machine owners․
Effective troubleshooting and regular maintenance ensure your GE washing machine operates efficiently, extending its lifespan and preventing unnecessary repairs․
Final Thoughts on Effective Troubleshooting and Maintenance
Regular maintenance and prompt troubleshooting are key to extending the lifespan of your GE washing machine․ By following the manual’s guidelines, you can identify and resolve issues early, preventing costly repairs․ Simple steps like checking hoses, leveling the machine, and cleaning filters can significantly improve performance․ Utilizing diagnostic modes and understanding error codes empowers you to address problems effectively․ GE’s support resources, including online manuals and expert assistance, further ensure your appliance runs smoothly for years to come․