The Honeywell T6 is a programmable thermostat designed for smart home integration, offering energy efficiency and ease of use. Proper installation ensures optimal performance and functionality.
1.1 Overview of Honeywell T6 Thermostat
The Honeywell T6 is a programmable thermostat designed for smart home integration, offering advanced features like geofencing and adaptive learning. It learns your heating and cooling preferences over time, optimizing energy use. Compatible with most HVAC systems, it requires a C wire for power. The thermostat supports Wi-Fi connectivity, enabling remote control through the Honeywell Home app, making it ideal for modern, energy-efficient home automation.
1.2 Importance of Proper Installation
Proper installation of the Honeywell T6 thermostat is crucial for ensuring accurate temperature control, energy efficiency, and system reliability. Incorrect installation can lead to poor performance, increased energy bills, or even damage to the HVAC system. Following the installation manual carefully helps avoid common issues and ensures compatibility with your home’s heating and cooling setup. A well-installed thermostat also enhances safety by preventing electrical hazards.
Package Contents and Requirements
The Honeywell T6 package includes the thermostat, UWP mounting system, Honeywell standard installation adapter, and optional decorative cover plate. Ensure 24VAC power (C wire) and compatibility with your HVAC system before installation.
2.1 Items Included in the Package
The Honeywell T6 package includes the T6 Pro Wi-Fi Thermostat, UWP Mounting System, Honeywell Standard Installation Adapter, and an optional decorative cover plate for aesthetic appeal. Additional items like mounting screws and AA batteries for power backup are also provided to ensure a seamless installation process. These components are essential for proper setup and functionality.
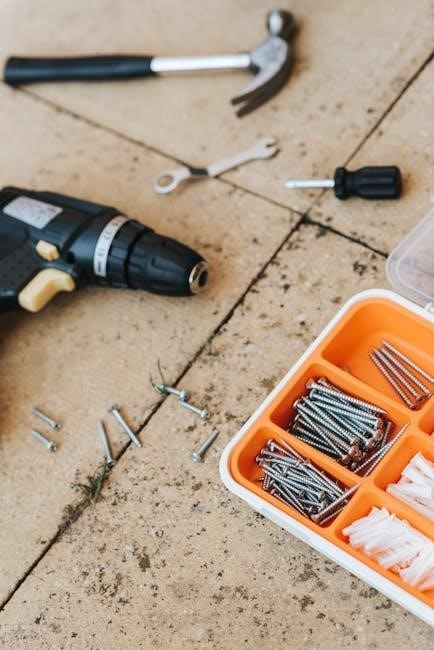
2.2 Tools and Materials Needed
A screwdriver, level, and drill with bits are essential for installation. Additional materials include wall anchors, cable ties, and wires. Ensure all tools are readily available to streamline the process. Proper preparation of these items helps avoid delays and ensures a secure, level installation of the Honeywell T6 thermostat.
System Compatibility
The Honeywell T6 is compatible with most HVAC systems, including heating, cooling, and heat pumps. It requires 24VAC power and does not support electric baseboard or millivolt systems.
3.1 Compatible HVAC Systems
The Honeywell T6 works seamlessly with most heating, cooling, and heat pump systems. It supports forced air, radiant, and geothermal systems, offering precise temperature control. Additionally, it is compatible with dual-fuel systems and multi-stage HVAC equipment, ensuring versatility for various home setups. Proper installation ensures smooth integration with existing systems, enhancing comfort and energy efficiency.
3.2 Incompatible Systems
The Honeywell T6 is not compatible with electric baseboard heaters or systems requiring 120-240V power. It also does not support millivolt systems, which are common in older heating setups. Additionally, it cannot be used with systems lacking a 24VAC power source, as this is essential for its operation. Ensure compatibility before installation to avoid potential issues or malfunctions.
Mounting Systems
The Honeywell T6 offers two mounting options: the UWP Mounting System for standard installations and an optional cover plate for junction boxes or covering old paint gaps.
4.1 Optional Cover Plate Installation
The optional cover plate is ideal for installations where the thermostat is mounted to an electrical junction box or to cover gaps left by previous thermostats. It ensures a seamless and neat appearance. Simply attach the cover plate to the junction box using the provided screws. This feature enhances the overall aesthetic and provides a professional finish to the installation process, ensuring the Honeywell T6 blends seamlessly with any home decor.
4.2 UWP Mounting System Setup
The UWP (Universal Wall Plate) mounting system provides a secure and level installation surface. Separate the cover plate from the mounting plate and attach the latter to the wall using the provided screws. Ensure the plate is level before tightening. This system accommodates various wall types and simplifies the installation process, ensuring the Honeywell T6 thermostat is securely and neatly mounted for reliable operation and optimal performance.
Wiring and Power Options
The Honeywell T6 supports various wiring configurations, including terminal connections for HVAC systems. It can be powered via a C wire or AA batteries for backup.
5.1 Understanding Terminal Connections
Terminal connections are crucial for proper Honeywell T6 installation. The R (24V AC) and C wires provide primary power, while batteries offer backup. Insert wires into designated terminals, ensuring secure connections. Use a screwdriver to tighten terminal tabs. Proper wiring ensures reliable thermostat operation and avoids system malfunctions. Refer to the manual for specific terminal assignments and compatibility with your HVAC system.
5.2 Battery and Power Configuration
The Honeywell T6 supports both battery and hardwired power options. Insert AA alkaline batteries for backup or primary power. The C terminal is optional but recommended for reliable 24V AC power. If using batteries, ensure they are securely inserted to avoid power interruptions. For hardwired systems, connect the R and C wires to maintain consistent operation. This configuration ensures the thermostat functions efficiently in any setup.
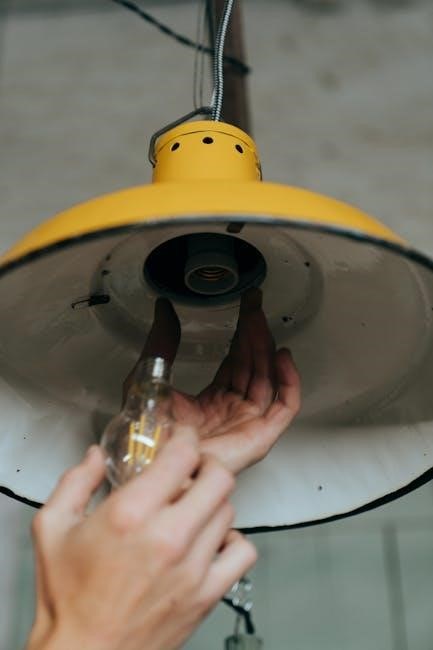
Installation Process
The Honeywell T6 installation involves mounting the plate, leveling, and connecting wires. Follow the step-by-step guide to ensure a secure and optimal setup for your thermostat.
6.1 Step-by-Step Installation Guide
Begin by turning off power to your HVAC system. Remove the old thermostat and note the wiring connections. Install the UWP mounting system or optional cover plate, ensuring it is level. Connect the wires to the appropriate terminals, referring to the manual for guidance. Secure the mounting plate and attach the T6 thermostat. Finally, restore power and test the system to ensure proper functionality.
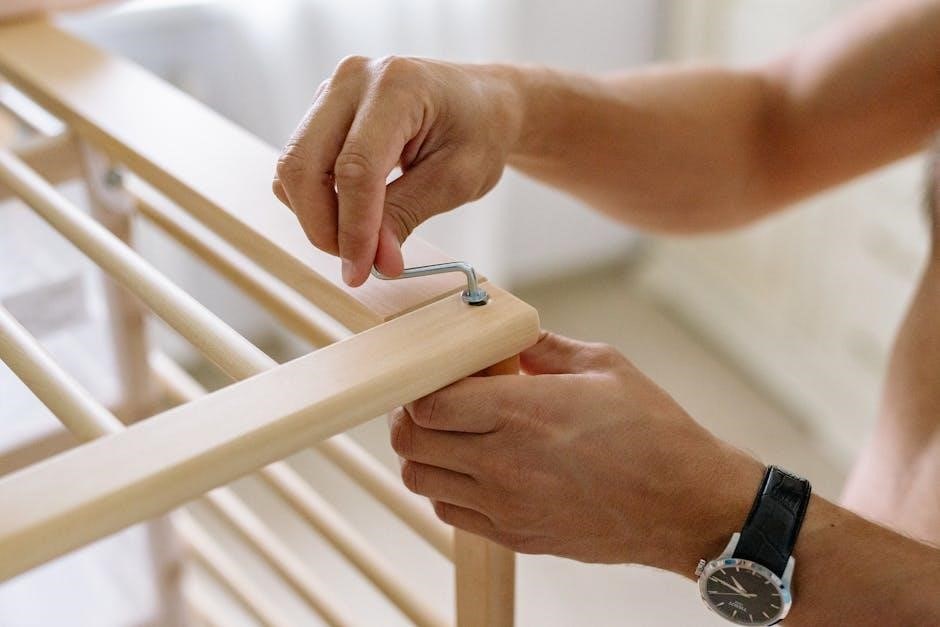
6.2 Mounting Plate and Leveling
Attach the UWP mounting plate to the wall using the provided screws. Ensure the plate is level by using a spirit level. Tighten the screws securely without overtightening. If using the optional cover plate, snap it into place after mounting the thermostat. Proper alignment ensures a seamless installation and optimal thermostat performance;
Thermostat Setup and Configuration
Power on the thermostat and follow the on-screen prompts for initial setup. Program schedules, temperature settings, and preferences. Enable features like energy-saving modes or smart home integration for enhanced functionality.
7.1 Initial Setup and Programming
After installation, power on the thermostat and follow the on-screen prompts. Set your preferences, including temperature range and scheduling. Program daily or weekly schedules to optimize energy use. Enable features like energy-saving modes or geofencing for smart automation. Ensure all settings are saved to maintain your configured preferences. Refer to the manual for advanced programming options and feature customization.
7.2 Adaptive Learning Feature
The Honeywell T6 features adaptive learning, which analyzes your HVAC system’s performance. It learns how long your system takes to reach desired temperatures, adjusting operation for comfort and efficiency. This feature ensures your home is at the set temperature when needed, minimizing energy waste. Over time, it optimizes heating and cooling cycles, enhancing overall system performance and user satisfaction. Enable this feature during initial setup for optimal results.

Advanced Features
The Honeywell T6 offers smart home integration, geofencing, and a learning algorithm that adapts to your system and preferences, enhancing efficiency and convenience for users;
8.1 Smart Home Integration
The Honeywell T6 seamlessly integrates with popular smart home systems like Amazon Alexa and Google Home. Users can control the thermostat using voice commands or through the Honeywell Home app, enabling remote temperature adjustments and automation. This feature enhances convenience and allows for energy-saving scheduling, ensuring your home is comfortable when you arrive and energy-efficient when you’re away. Smart home integration also supports advanced scenes and routines, making it easy to customize your heating and cooling preferences. By connecting the T6 to your smart home ecosystem, you can optimize your HVAC system’s performance and enjoy a modern, connected living experience. The app provides real-time updates and notifications, ensuring you stay in control of your home’s climate. This integration is a key advantage for users looking to upgrade their home automation capabilities.
8;2 Geofencing and Scheduling
The Honeywell T6 supports geofencing, using your smartphone’s location to adjust temperatures when you leave or arrive home. This feature optimizes energy usage by automatically switching to an energy-saving mode when you’re away. Additionally, scheduling through the Honeywell Home app allows you to create custom temperature plans for different times of the day, enhancing comfort and energy efficiency. These features make managing your HVAC system convenient and adaptable to your lifestyle, ensuring your home is always comfortable while reducing energy bills.
Troubleshooting Common Issues
Common issues include display not turning on, incorrect temperature readings, or connectivity problems. Check power sources, wiring connections, and ensure proper installation. Resetting the thermostat often resolves these issues.
9.1 Common Installation Problems
Common installation issues include improper wiring connections, such as incorrect terminal assignments or loose wires. Additionally, forgetting to install the C-wire or improper leveling of the thermostat can cause malfunctions. Ensuring all connections are secure and the thermostat is level can prevent these problems. Always refer to the manual for specific wiring diagrams and guidelines to avoid installation errors.
9.2 Resetting the Thermostat
To reset the Honeywell T6 thermostat, remove the batteries and disconnect the power supply for 10 seconds. Reinstall the batteries and reconnect power, then follow the on-screen setup process. This resets all settings to factory defaults, resolving configuration issues. Always ensure the thermostat is level and properly mounted after resetting for accurate temperature readings and functionality.
Maintenance and Care
Regularly clean the thermostat to prevent dust buildup and ensure accurate temperature readings. Update the software periodically to maintain optimal performance and functionality.
10.1 Cleaning the Thermostat
Regular cleaning ensures accurate temperature readings and optimal performance. Use a soft, dry cloth to gently wipe the thermostat’s surface, removing dust and debris. Avoid harsh chemicals or liquids, as they may damage the device. For stubborn stains, lightly dampen the cloth with water, but ensure no moisture enters the thermostat. Cleaning should be performed every 2-3 months or as needed.
10.2 Updating Software
Regular software updates ensure your Honeywell T6 thermostat performs optimally. Use the Honeywell Home app to check for and install updates. Connect your thermostat to Wi-Fi, open the app, and navigate to the settings menu. Select “Check for Update” and follow prompts to download and install the latest version. Avoid interrupting the update process to prevent issues. Updates enhance features and improve performance, so keep your device current for the best experience.
Safety Precautions
Avoid placing the Honeywell T6 near direct sunlight, heat sources, or drafts. Ensure it is at least 1.2-1.5 meters above the floor. Follow electrical safety guidelines and local regulations.
11.1 Installation Location Guidelines
Ensure the Honeywell T6 is installed in a location free from direct sunlight, heat sources, and drafts. Maintain a distance of at least 1.2-1.5 meters from the floor. Avoid areas near metal objects or boilers for accurate temperature sensing. Proper placement ensures reliable operation and energy efficiency.
11.2 Electrical Safety Tips
Always turn off the power supply at the circuit breaker before starting installation. Use a voltage tester to confirm no power is present. Avoid overtightening wires, which can damage terminals. Ensure proper grounding and avoid mixing systems requiring 120/240V with the T6, which operates on 24VAC. Never handle live wires to prevent electrical shock or damage to the thermostat.
Completion of the Honeywell T6 installation ensures optimal performance. For further assistance, visit Honeywell’s official website or contact their customer support team for detailed guidance and resources.
12.1 Final Check and Testing
After installation, perform a final check to ensure all components are securely connected and functioning properly. Test the thermostat’s display, temperature control, and smart features. Verify that heating, cooling, and fan modes operate correctly. Check for any error messages and refer to the user manual for troubleshooting. Ensure the system cycles on and off as programmed to confirm successful installation and functionality.
12.2 Where to Find Additional Support
For additional support, visit the official Honeywell website or download the Honeywell Home app for configuration guidance. Contact Honeywell customer support for troubleshooting or replacement information. Refer to the user manual or installation guide for detailed instructions. Additional resources, including FAQs and video tutorials, are available on the Honeywell website to assist with any installation or operational queries.